1985-1993
2000
2003-2006
2008-2009
2015-2020
My 1968 VW Type 2 Bus Conversion

Front & Rear Disc Brake Conversion
by Harold Williams
October 2007
Sections: Rear Brakes · Front Brakes · Master Cylinder · Line Lock · Parts ·
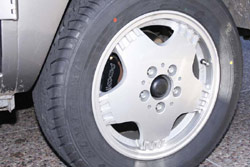 In 1993 I converted the stock brakes on my '68 Crewcab to '73 front
discs and '71 rear drums. I used the spindles, rotors,
hubs, etc. from a '73 bus for the front. For the back I used the hubs,
drums, etc. from a '71 bus. The hubs were
re-drilled to a 5x112 12mm Mercedes bolt pattern. For wheels,
I have OZ Racing 6x15
et35's front & rear, and for tires I'm using
205/60/15's front and 215/60/15's Pirelli P6000 in the
rear. I don't haul anything heavy so I wasn't concerned about using
a light truck tire.
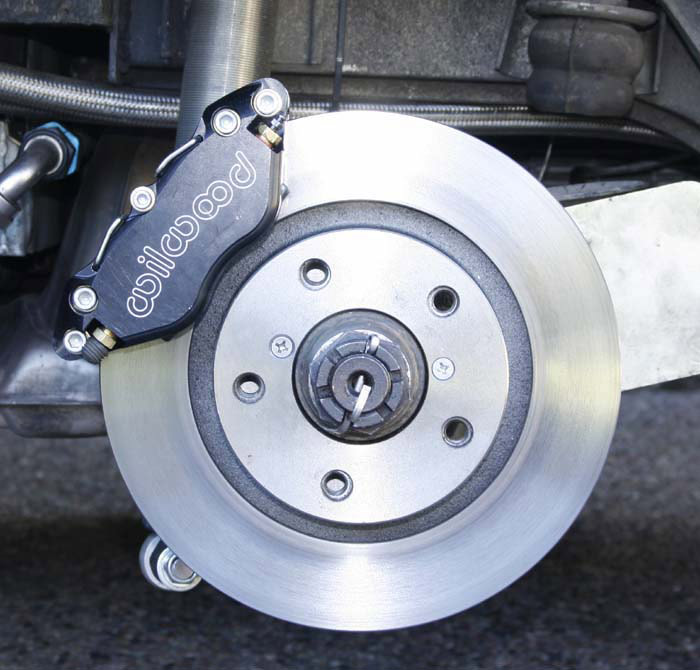
In 1993, I couldn't find a kit to convert the back brakes to a disc system, so in the intervening time, I've continued looking. Since I haven't been able to find anything I decided to design my own. My goals were to have the calipers clear 15" wheels, retain the 5 x 112 bolt pattern, use a rear rotor that had a diameter similar to the stock front rotor, and to use as many over-the-counter parts as possible.
After looking at a few different calipers I decided to go with Wilwood. They have a wide variety of calipers with different piston bores. They also have various width calipers based on the disc widths. Since the rear calipers I used have no hand brake provisions, I installed a line lock. I debated about using their caliper with a mechanical handbrake but decided to use a 4 piston caliper for better stopping power.
I also looked at using one of their kits that comes with a standard park brake. This set up could be made to work, but would require having custom hats made and upgrading to 16" or 17" wheel. Instead I used an Audi A6 rear rotor measuring 269mm x 22mm (10.59" x .810") which allowed me to retain my 15" wheels.
Below is a description and photos of the installation. At the bottom of the page is a list of parts with part numbers. I've also listed a few rear rotor alternatives.
I am not affiliated with any vendors mentioned. The images and text on this page can be used for non-commerical purposes only.
Click on any photo to enlarge.
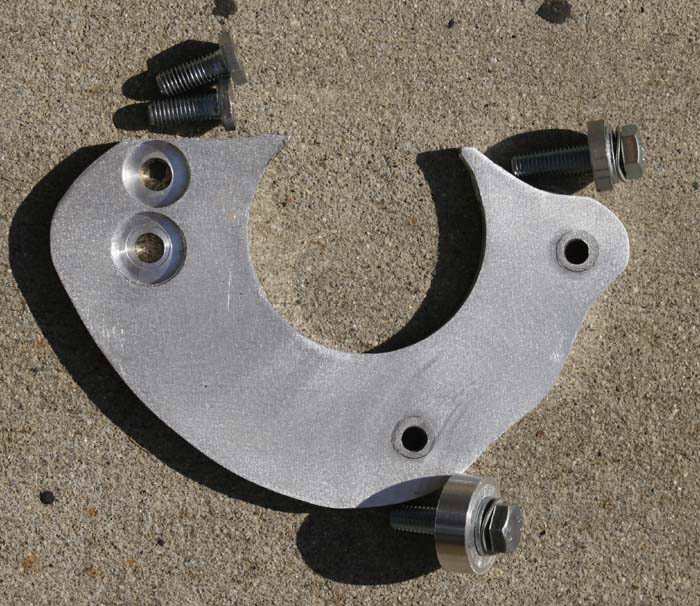
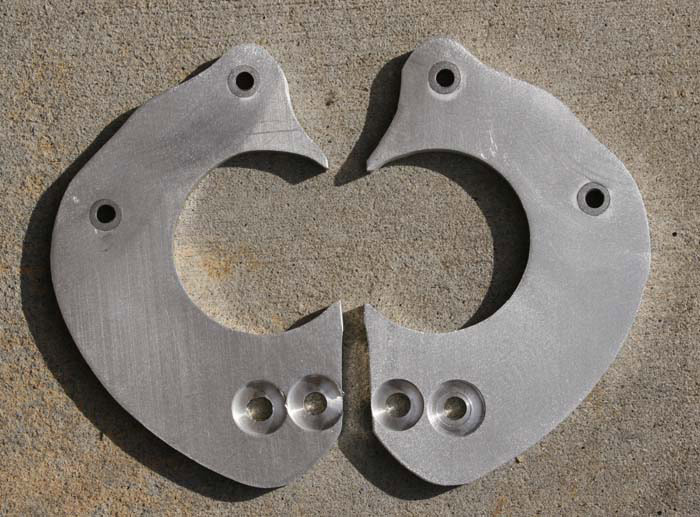
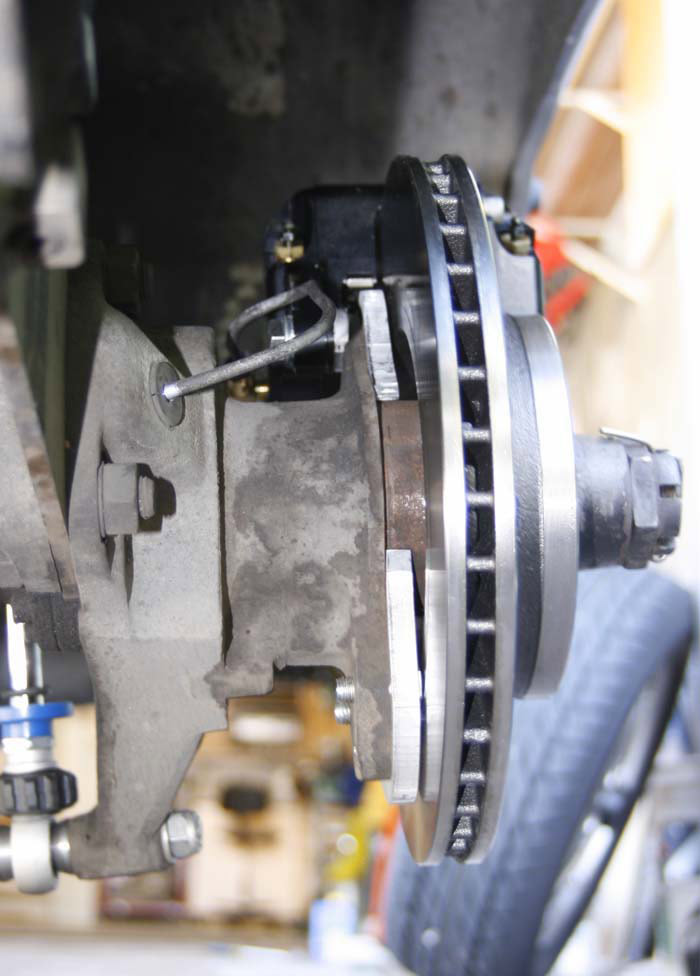
The rear is more involved since I had to fabricate caliper brackets. I made a wood template out of 1/4" plywood. The stock backing plate mounting holes were used to mount the bracket, one at the top, and two at the bottom. Once the template fit right, it was transfered to 3/8" T6 aluminum plate. Steel would also be a good alternative. I countersunk the lower bracket holes. The heads of the lower bolts had to be have about .100" removed to clear the rotor. I used the top hole to mount the bracket and as the top caliper mount. The bracket mounts on the rotor side of the trailing arm. To determine where to drill the lower caliper mounting hole, bolt the bracket to the trailing arm, install the rotor and set the caliper on top of the rotor with the brake pads installed. Bolt the caliper to the top trailing arm hole. This allows you to move the lower part of the caliper up and down until the top of the pads are flush with the top of the rotor. After the lower hole is located and drilled, add steel inserts to accept a 10mm x 1.5 bolt. I did all the fab work at home. If you don't have the tools to do this you could take the wooden template to a machine shop and have them cut it out and drill & tap the necessary holes.
To center the caliper over the rotor, I used a
1/4"x 1.00" diameter spacer between the trailing arm top bolt hole
and caliper and a .470"x 1.375" diameter bottom spacer between the bracket and
caliper. I used 10mm x 1.5 bolts, lock washers and blue
locktite. These dimensions may vary. You may need to
use additional washers to get the correct spacing. The bolt length is
very important. Make sure the caliper bolts extend throught the adapter, but don't protrude out the other side.
I had to file a small flat section on
the upper 1/4" spacer so it sat flush on the trailing arm. You should
bolt the bracket
and caliper onto the trailing arm without the rotor to make sure it
fits correctly and doesn't bind. Since the tolerances are so close I
repeatedly
test fit everything to make sure nothing was binding or rubbing. The
rear rubber
lines were replaced with s/s lines approx. 11" long, male/female
drivers side, female/female passenger side. I
re-shaped the exsisting hard lines to the calipers. The rear calipers
used a metric bubble flare-female to 1/8" pipe-male elbow to connect to the
exsisting lines. If either pad drags on the rotor try shimming
the caliper to better center it. Wilwood makes
brake pad shims if you find that the caliper is slightly off-center.
-
rear bracket -
rear bracket -

caliper bracket -
rear disk -

rear disk -

rear disk -
rear disk -
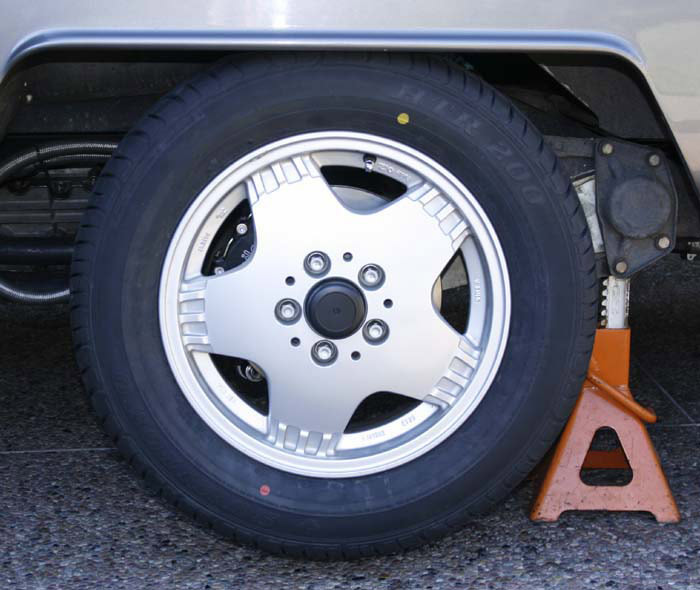
rear disk -
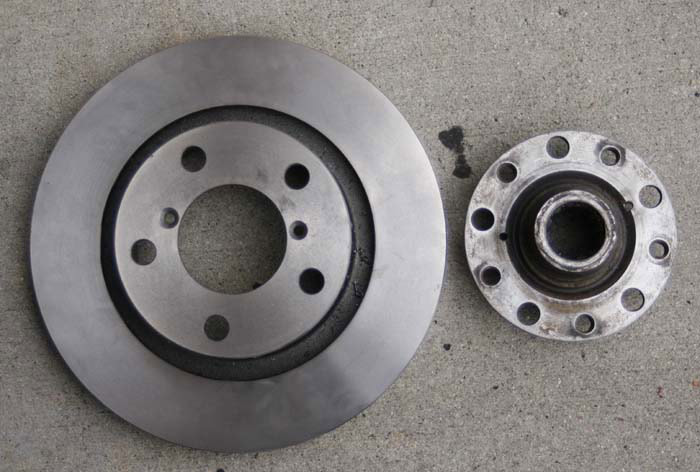
rotor and hub
The rear hubs need to be turned down to fit inside the Audi rotor. I had this done at a local machine shop. The hubs were drilled & tapped in 2 spots to take 6mm screws. The rotors were drilled and countersunk. Two 6mm flat head screws with blue locktite are used to hold the rotor to the hub.
The only problem I ran into was that the thickness of the rotor face moves the wheel out 1/4". In my case it was just enough to cause the 215's to rub the fender. For the interim I switched to 205/65/15's for the rear. Using a 6"' or 7" wheel with a 45-50et would allow a 215 to fit.
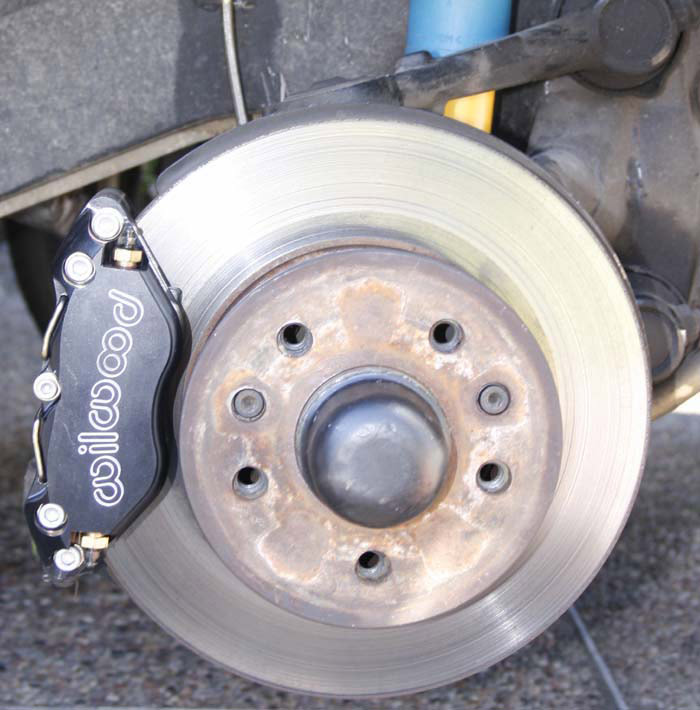
At first I was going to retain the stock front caliper and just do the rear disc conversion. The stock front calipers are big enough. They use the same pad as an early 911 caliper. Since Wilwood makes a narrow mount caliper with a 3.5" mount spacing I decided to try that. I ended up machining off a 1.150" diameter area x 0.062" depth off of the caliper mount surface to center the caliper over the rotor. The caliper mounting holes were enlarged to 14mm. Longer bolts with lock washers were used. The calipers should be mounted without the rotor to make sure it mounts flush to the spindle ears. I had to file the spindle ears so the caliper sat flush. The rubber lines were replaced with s/s lines approx. 18" long, female/female. A straight adapter which goes from a metric bubble flare_female to 1/8" pipe_male was used to connect the lines to the calipers. The same adapter would also work with the stock rubber lines. I stayed with the stock rotors since I don't see anything else out there to replace them. I've seen shots of a Rossini vented rotor, but no U.S. distributor as far as I could find. If you installed vented rotors you would need to go with a different model Wilwood caliper that fit the wider width of the rotor. You could also retain the stock front calipers and go with a Wilwood rear caliper. I would talk to the tech department to determine what caliper to use based on the front caliper piston bore.
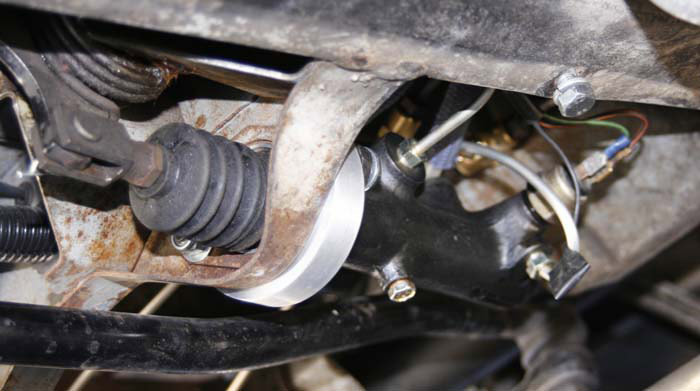
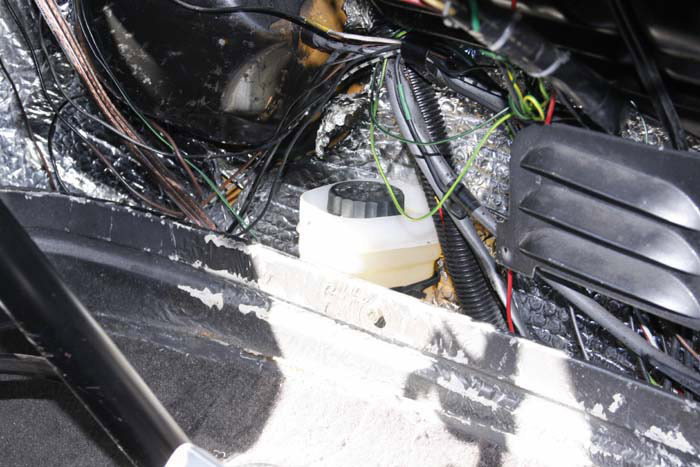
The original master cylinder was replaced with a 23mm Mercedes unit. (The Mercedes master cylinder is a common upgrade when going to bigger brakes, such as 930 or big Brembo's on early Porsche 911s.) You will need 2 plastic hose inserts for the master cylinder. The'70 and newer lower VW reservoirs will fit the Mercedes master cylinder. I didn't use a lower resevoir, so I replaced the upper resevoir with a used Porsche unit. The resevoir has a divider to seperate the brake fluid to the 2 circut master cylinder. I ran 2- 7mm blue brake lines down to the master cylinder inlets. The later style dual circut VW master cylinders are also a good alternative.
The Mercedes unit has 3 inlets. I put a tee fitting for the 2 front lines for one inlet. The rear line for the second inlet, and the brake switch for the third inlet. I used a power bleeder to bleed the system. Since there is old fluid in the lines 2 quarts were used to flush it the first time. I made sure everything worked, and drove it around. I bled the system for a second time since the fluid still had some crap in it and brakes were slightly spongy. When the system is bled correctly there should be 2-3" of pedal travel.
The hand brake mechanism and cables were removed. The line lock was mounted below the ash tray where the hand brake handle was. I used brake line couplers to attach the new hard lines from the line lock to the m/c and the exsisting rear brake line. I removed the heater vent to route the lines behind it. I massaged the back of the vent with a hammer so the lines would clear.
Rear
-
Wilwood 120-9728 calipers for .810 (20.6mm) disc width. 4 piston x 35mm bore size.
- Rotors: 269mm diameter (10.760") x 22mm vented. Centric #120-33072 (Audi A6). Also available in a slotted rotor.
- Hubs: '71 VW hubs. Diameter machined down to fit inside of rotor. Drilled & taped for 6mm retaining screws
- Pads: Wilwood (7816) 150-8946k / BP-10 smart pad.
- Lines: s/s 11" metric female/female passenger side, female/male drivers side. Used original hard lines from s/s lines to calipers.
- Fittings: Elbow fitting metric bubble (female to 1/8" flare male.
- Caliper brackets & spacers: T6 aluminum
- Grade 8 bolts 10mm x 1.5 x 40mm.
- Approx. $850.00
Front
- Wilwood 120-9735 calipers for .050" (12.7mm) disc width. 4 piston x 44mm bore size.
- Stock v.w. disc #211-615-301A ('71-'72) or 301B ('73-'79). They measure 273mm (10.75") x 12.7mm (.510) thick.
- Pads: Wilwood (7816) 150-8946K / BP-10 smart pad.
- Lines: s/s 18" metric female/male.
- Fittings: Straight fitting metric bubble (female) to 1/8"
flare male (caliper)
- Approx. $500 not including the rotors.
Master cylinder
- 23mm Mercedes. 9/16" thick x 3" diameter spacer ring,
long bolts, nuts, washers, and the original rod
- 2 plastic resevoir fittings for the top of the master cylinder
- blue 7mm brake line
- used porsche resevoir & bracket
- line lock
- hard lines from m/c to line lock.
- couplers, metric bubble female/female.
- short hard lines to connect exsisting lines to m/c
- Approx. $250.00
Notes on the rotors
- These are larger rear vented rotors for an Audi. They
would not work with a 15" wheel. 298mm diameter(11.73") x 20mm, 305mm
diameter(12.00").
- Mercedes 257mm diameter (10.12") solid rotor for a '84-'93 190E 2.3/2.6. This looks like it would work with some of the OE rear calpers with handbrake used on some of the bug kits.
Overview |
Porsche Engine Conversion |
Front & Rear Disc Brake Conversion
Hydraulic Clutch Conversion |
Fuchs wheel conversion
Rack & Pinion Conversion |
Porsche 935 front suspension conversion |
RC10 VW Bus
© 2008 - 2026 Harold Williams
